Difference between revisions of "Getting started with MATLAB or Python"
(Undo revision 298 by Elliotcameron (talk)) |
|||
| Line 1: | Line 1: | ||
=Introduction to the Command Line= | =Introduction to the Command Line= | ||
{| border="1" width="100%" cellspacing="10" | |||
<!-- LEFT BLOCK --> | |||
| width="50%" valign="top" | | |||
{| border="0" cellpadding="3" | |||
| valign="top" | | |||
===MATLAB=== | |||
*MATLAB IS CASE SENSITIVE!!! For example, '''A''' is not the same thing as '''a'''. This is very important when working with variable and function names. | *MATLAB IS CASE SENSITIVE!!! For example, '''A''' is not the same thing as '''a'''. This is very important when working with variable and function names. | ||
| Line 98: | Line 105: | ||
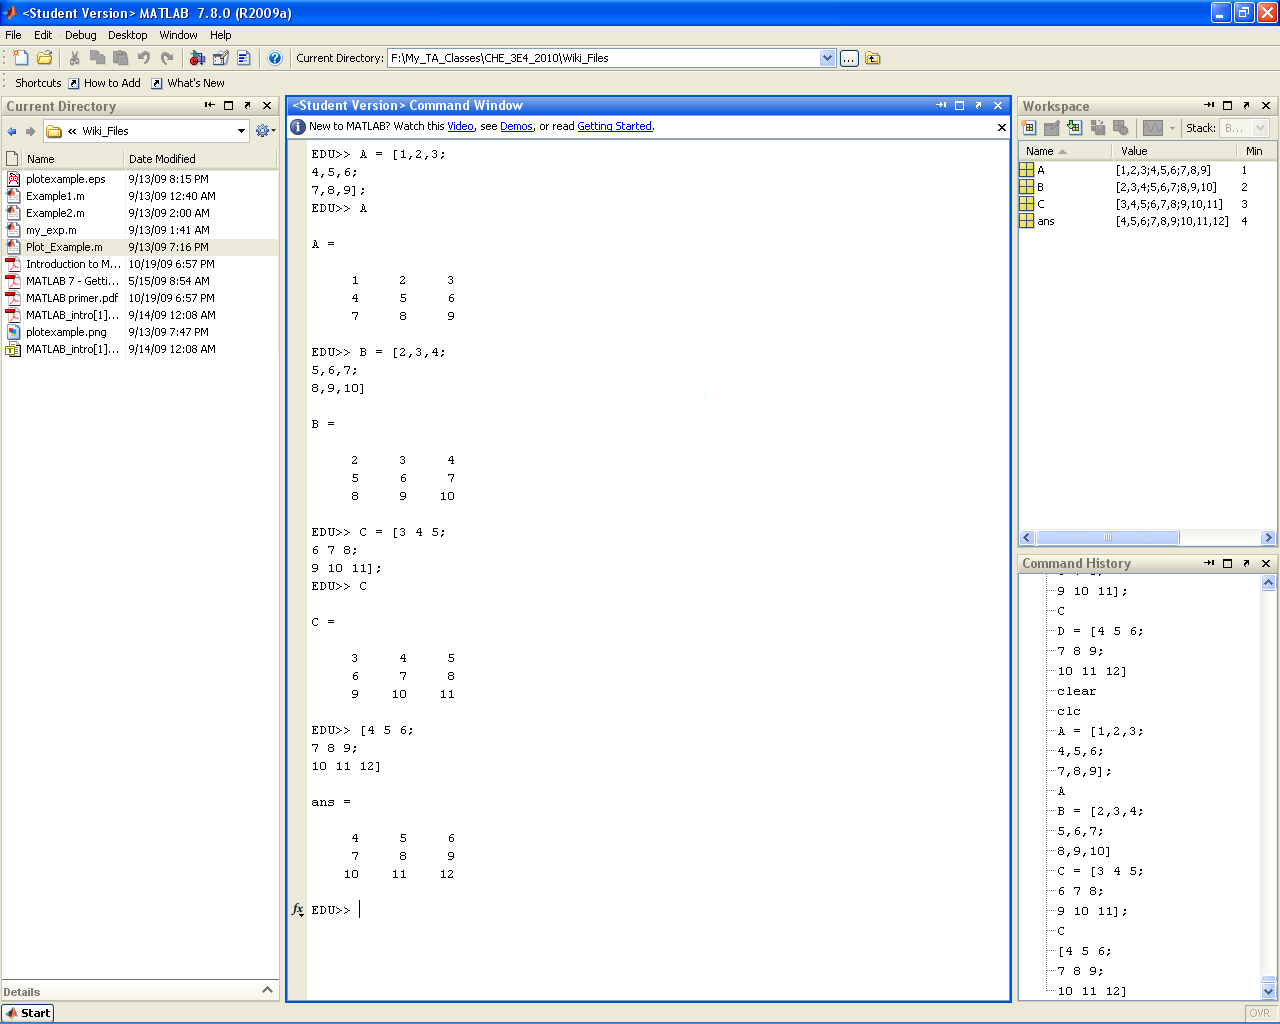
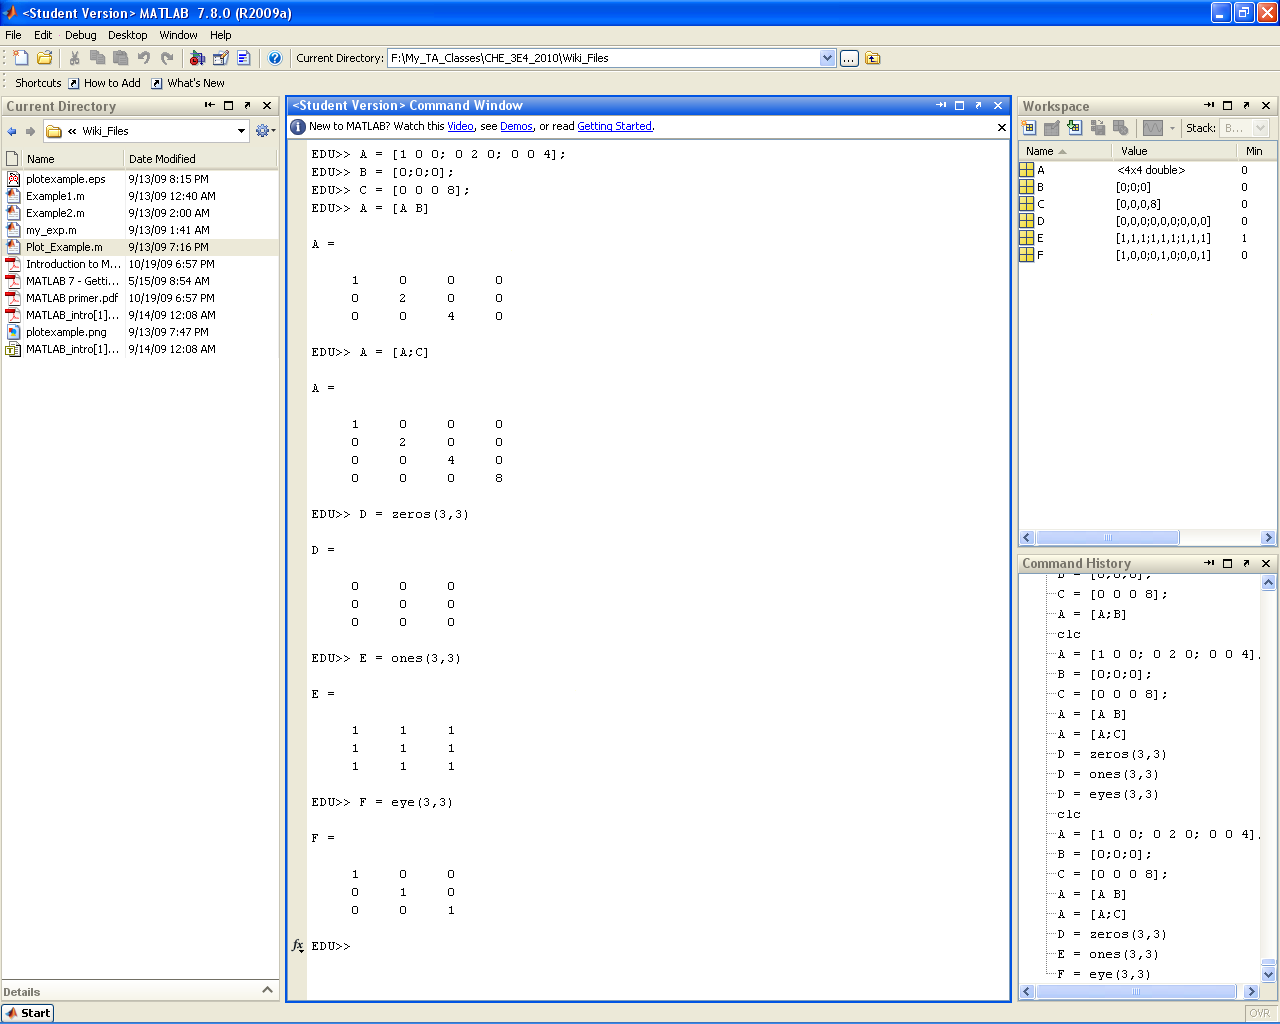
Matrices can be combined through a process called concatenation. In horizontal concatenation two matrices are joined from "left to right" (i.e. the new matrix has the same number of rows but a new number of columns equal to the sum of the columns in the two original arrays). Horizontal concatenation of two matrices is achieved through the use of the square matrix declaration brackets "[]". To concatenate the arrays simply place them in the square brackets with a space or comma between them (shown below). Naturally the two matrices being horizontally concatenated must have the same number of rows (or else MATLAB will spit out an error). Vertical concatenation follows the same logic as horizontal concatenation but combines matrices "top to bottom". This time the new matrix has the same number of columns but a new number of rows. To accomplish vertical concatenation the arrays must be placed in a square bracket separated by a semicolon (shown below). This time the arrays must have the same number of columns for the concatenation to be successfull. | Matrices can be combined through a process called concatenation. In horizontal concatenation two matrices are joined from "left to right" (i.e. the new matrix has the same number of rows but a new number of columns equal to the sum of the columns in the two original arrays). Horizontal concatenation of two matrices is achieved through the use of the square matrix declaration brackets "[]". To concatenate the arrays simply place them in the square brackets with a space or comma between them (shown below). Naturally the two matrices being horizontally concatenated must have the same number of rows (or else MATLAB will spit out an error). Vertical concatenation follows the same logic as horizontal concatenation but combines matrices "top to bottom". This time the new matrix has the same number of columns but a new number of rows. To accomplish vertical concatenation the arrays must be placed in a square bracket separated by a semicolon (shown below). This time the arrays must have the same number of columns for the concatenation to be successfull. | ||
[[File:MATLAB_concatenation.PNG|center|400px]] | [[File:MATLAB_concatenation.PNG|center|400px]] | ||
|} | |||
<!-- RIGHT BLOCK --> | |||
|width="50%" valign="top" | | |||
{| border="0" cellpadding="3" | |||
| valign="top" | | |||
===Python=== | |||
|} | |||
|} | |||
=Scripts and Functions= | =Scripts and Functions= | ||
{| border="1" width="100%" cellspacing="10" | |||
<!-- LEFT BLOCK --> | |||
| width="50%" valign="top" | | |||
{| border="0" cellpadding="3" | |||
| valign="top" | | |||
===MATLAB=== | |||
====Scripts==== | ====Scripts==== | ||
*Scripts are a series of statements, saved in a .m file, that are all executed at once. | *Scripts are a series of statements, saved in a .m file, that are all executed at once. | ||
| Line 134: | Line 162: | ||
*A function can assign multiple output variables (consult MATLAB help to find out how) | *A function can assign multiple output variables (consult MATLAB help to find out how) | ||
*Functions can call other functions | *Functions can call other functions | ||
|} | |||
<!-- RIGHT BLOCK --> | |||
|width="50%" valign="top" | | |||
{| border="0" cellpadding="3" | |||
| valign="top" | | |||
===Python=== | |||
|} | |||
|} | |||
=Code Structures= | =Code Structures= | ||
{| border="1" width="100%" cellspacing="10" | |||
<!-- LEFT BLOCK --> | |||
| width="50%" valign="top" | | |||
{| border="0" cellpadding="3" | |||
| valign="top" | | |||
===MATLAB=== | |||
|} | |||
<!-- RIGHT BLOCK --> | |||
|width="50%" valign="top" | | |||
{| border="0" cellpadding="3" | |||
| valign="top" | | |||
===Python=== | |||
|} | |||
|} | |||
=Plotting Data= | =Plotting Data= | ||
{| border="1" width="100%" cellspacing="10" | |||
<!-- LEFT BLOCK --> | |||
| width="50%" valign="top" | | |||
{| border="0" cellpadding="3" | |||
| valign="top" | | |||
===MATLAB=== | |||
|} | |||
<!-- RIGHT BLOCK --> | |||
|width="50%" valign="top" | | |||
{| border="0" cellpadding="3" | |||
| valign="top" | | |||
===Python=== | |||
|} | |||
|} | |||
Revision as of 16:23, 13 September 2010
Introduction to the Command Line
|
|
Scripts and Functions
|
|
Code Structures
|
|
Plotting Data
|
|
Additional Resources
|
|
